Sunday 29 January 2017

Maintenance Update (eccentric, pipe, felt, coupling)

Wednesday 25th
Brian and David M took the left-hand eccentric rods off to be cleaned and give access to the eccentric strap. The left-hand inner strap was taken off for Gilbert to measure wear.


There is wear … there’s bound to be after 6 years of operation … but Carpo said it is fine for now and should last to the 10 year overhaul at which stage all four straps will need re-white-metalling.


John T and David M refitted the cladding round the main steam pipes. John then moved on to designing the final loco/tender link alignment gadget. This took the rest of the day, because of design discussions, options and measurements. John marked out a piece of steel ready to start cutting next time.


John G, meanwhile, cleaned up the three links and applied a shiny coat of paint. Oh, and the main drag link passed its NDT (Non-destructive test) on Monday.


Having warmed up a paintbrush, John then decided to apply another coat of Deep Bronze Green to parts of the cab and its handrails.

The grease nipple on the RHS rear tender brake hanger whole thread has expired received some stern treatment from Bruce - he “bushed the hole” (quote). This simply involved tapping out the hole in the hanger to the next size up, and fitting a reducing bush such that the original nipple now fits.


Gil mostly undertook measuring and was part-time gopher.

I attacked a pile of rail chairs, making a start to build up a stock of boot scrapers when the season begins. Anyway, John M keeps pestering me for an LMS one in crimson already!

Saturday 28th
David, Bruce and Gilbert cogitated over the eccentrics. You see, there should be a felt pad in the arrowed recess for wiping oil over the surfaces. There isn’t! This is not the first time that felt has  vanished. There was none in the first strap that was removed on Wednesday; so they took the second  one off carefully and hey presto: no felt pad! Another vanishing trick.


Jeff Lacey (Loco Dept) was observing, and he suggested that perhaps there was something on the sheaves themselves that was shaving the bottom of the felt pad. Over time, the felt has been worn away.


The chaps examined the sheaves and cleaned them up, but there no obvious step that presented a sharp edge. Where the two halves meet, there is a change in the surface, though not noticeably sharp. New pads were fitted. By end of day, the eccentrics were back in place.

For the whole day, John T was designing and working on making a Mk 2 version of the loco/tender coupling guide - out of metal. Many cutting discs expired; David welded a couple of length together, and progress seems to be being made. Later, I fitted the three drag links back in the tender, as John will need them in place to complete his gadget.

The new tapered pin for the rocking shaft had been delivered. David and Bruce examined it and felt that the taper was not quite correct. Furthermore, our tapered reamer needs sharpening. Bruce has some thoughts on correcting the taper fit.

I spent the morning painting rail chairs. After lunch, I decided to fit the tender right-hand rear brake hanger (the one previously with the duff nipple). It proved too heavy for me, so David and Bruce assisted while Gilbert offered encouragement.


I was given the honour of testing the nipple with the red grease gun.


Roger

Sunday 22 January 2017

Maintenance Update (draw, punch, curve, press)

Wednesday 18th
The six of us were assisted at times by several Loco Dept chaps. Most notably, two chaps applied a second coat of bitumen paint to the rear section of the tender top. They couldn’t do the main coal space because Bruce and I were getting in their way!


What we were trying to do was to remove the nut on the end of the draw bar to check the quality of the thread. Access is below a removable panel in the tender, at the bottom of the coal chute. It’s a big nut! There is a key through the bar to prevent the nut from undoing and falling off. Between key and nut there is one large washer. The key has a split pin through it to prevent it from falling out.


It took Bruce & me the best part of an hour to remove the split pin. We had to break it off and punch it out, in the end. Then the key flatly refused to budge. Even if we had managed to remove it, how were we going to get a spanner on that nut? Anyone got a socket that large? We removed the inspection panel (labelled) but all you can see beneath it is a cup housing rubber shock absorbers! Going up from beneath, Bruce didn’t think there was room to fit a spanner on the nut. How on earth did we fit it in the first place?

Carpo suggested that we would probably have to remove the vacuum cylinder. John P [Loco Dept] inspected what he could see, and the agreed stance was that it looks sound and will remain a task to tackle at the 10-year overhaul!

John G spent the day painting: Cab edges, handrails; then cladding pieces. Brian also assisted painting the cladding from the main steam pipes.


Bruce and Brian had earlier shinned up to the top and removed the clack valves. After cleaning up there, Bruce took the clacks away for homework.

Bruce & I had been thinking about making the coupling up of loco and tender foolproof, and John T joined in on the discussion. After several ideas were bounced around, John set to on making a prototype out of wood.


The idea is to fit a gadget to hold the three links on the tender at the correct height and in line with their holes in the loco. Thus ensuring that they engage instead of bashing the drag box; and the securing pins in the cab can be dropped through their holes instead of down the side of the links (which causes them to get bent when going round a curve).

Several of us gave the tender a heave to test the effectiveness, and the Mk 1 prototype was deemed rather successful. A minor adjustment will be required to the slot for the RHS link (nearest camera on left), but the LHS pin dropped in easily! The idea is that the gadget is removed once the loco and tender are coupled. Best not make the final one out of wood, though, else someone will light a fire with it.

Gilbert repacked the gland in the LHS valve, so that is now ready for the front cover and the rest of the valve motion to be refitted.


Saturday 21st
My first task was to remove the RHS rear tender brake hanger so that the greasing point can be attended to. The thread inside the hanger has been stripped; so the nipple won’t stay in place, and you can’t get grease in.


Meanwhile, Bruce had been investigating the safety links (between loco and tender) with a view to making it impossible to jam the securing pin down the side of the link (which happened two years ago). He cut two “ears” from a length of pipe, and David welded these onto the links at the loco end, on either side.


Now, when the link is in place, it cannot be pushed far enough across for the pin to drop down the side of the link.


David did a little bit of “domestic” welding: Gil is having difficulty climbing up into the van where we have tea breaks, so Bruce and I move a set of steps there for him. To make them easily removable and yet stable, David made a pair of brackets to fit to them, which hook on and secure the steps to the van.

David’s main job was the LHS rocking shaft bearing. He had skimmed a couple of thou off the housing to make sure it clamped the brass bearings tightly. Further minor dressing was required to the upper brass bearing to make it a good fit inside the housing. Gil was assisting David with this. David also reamed out one of the bushes in the valve link (which connects the rocking shaft to the valve spindle). Gil had bought a new reamer!

Paul and Cliff [Loco Dept] were trying to fix the 50 ton press that we need for straightening the main drag link. I joined in, but it still took us 4 hours (according to Cliff) to get the hydraulic pump in the right position and working!

Once that was fixed, Gil applied heat to the link. When he ran out of gas, we decided to try the press anyway - and sure enough, it managed to get the bend out of the link! This will undergo an NDT on Monday to ensure that it has no internal fractures.


Alex and Graham [Loco dept] cleaned up more of the cylinder cladding and front running boards. They get covered in greasy, oily muck underneath. We intend painting the whole of the running boards once the mechanical work is completed, and before going back into service.


Roger

Sunday 15 January 2017

Maintenance Update (bitumen, valves, snifting, coupling)

Wednesday 11th
There were hoards of us working on 2807 today! Brian, Bruce, Gilbert, John G and John T (oh, and me!) plus half-a-dozen Loco Dept Chap(ess)es, including Alex, Clive, Jeff, Tim and Peter.

Alex (nearest camera) skilfully having not painted herself and two chaps into a corner, applying bitumen paint to the coal space.


Thereafter, the rear section (with dome and filler) had to be painted, too. That was slightly trickier now that there was only one way up onto the back section! There ensued some toing-and-froing with a set of steps (that were being used to access the coal bunker of 4270 at the same time).

Brian dismantled the LHS rocking shaft, while, Gil and Peter looked on, practicing being gophers.


Apart from checking the wear, the intention is to ensure that the brass bearings clamp onto the rocking shaft with zero play. This may mean shaving a few thou’ off the casing (as we did on the RHS). All of this tightening of bearings is in anticipation of getting the valve timing spot on. It had been ‘not bad’, but slackness in various linkages makes it impossible to perfect.

John G and John T spent much of the day cleaning the piston valve heads. Getting the grot out of the grooves in the head turned out to be a challenge - one that required the use of a hacksaw blade!


Peter removed the nuts from the RHS cylinder cover in readiness for the piston to be measured for wear. However, the cover was rather reluctant to come off, so he wisely left this as a job that the Saturday gang can tackle. The cover did come off the RHS valve, though.

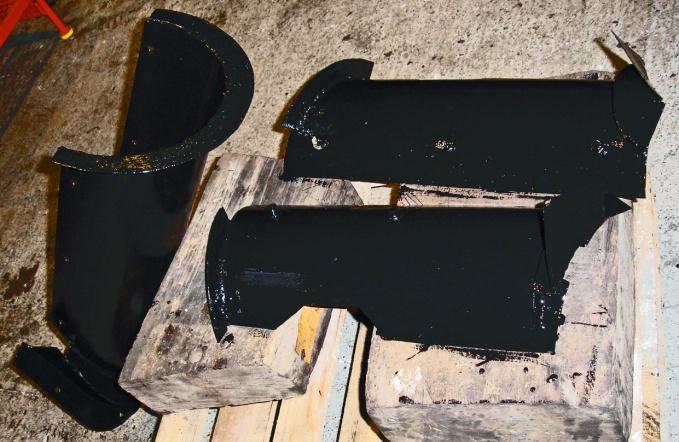
Bruce attacked Issue 55, and started to remove the snifting valves that are tucked away behind the
main steam pipes either side of the smokebox.

Although the nuts came off the studs fairly happily, the top of the valve unit couldn’t be lifted clear
of the base … because the cladding round the steam pipe was just getting in the way. Bruce is
indicating where a small amount of cladding will have to be cut away for easy access. The other photo is the top removed, and you can probably just see where the valve and its seat make
contact.


I fancied investigating the problem of aligning the three links (draw bars) between tender and loco,
which seem to cause other railways (notably the NYMR) a bit of a problem. First minor problem: the
team of painters in the tender! You see, I needed to part the loco and tender.

Checking that the loco wheels were chocked and the tender handbrake was on, I removed the securing pins from the links. I also put the fall plate back to cover the gap between loco and tender, foreseeing one of the dedicated team inevitably stepping backwards out of the tender and …. Aaagh!

While they were all slapping on bitumen, I decided to lift the wooden floor planks in the cab and give them a good clean. Coal dust and oil get jammed between them and underneath, too. Finally, the tender was gleaming black all over the top and the painters had adjourned. I released the handbrake and pushed the tender back a couple of feet.


Two years ago, NYMR managed to bend the RHS safety link (nearest camera) by getting the securing pin down the side of the link instead of through the hole in the end! This time, it looks as if the main (centre) draw bar must have been too low when coupling up, and hit the loco’s drag box; probably then bouncing up and into its hole. However, the bar definitely appears to have a droop!

Saturday 14th
Alistair, Brian, Bruce, David, Gil, John T plus several Loco Dept chaps were working away, mainly on the LHS valve and the rocking shaft. Alistair, John and I tackled the tender and the main draw bar.

Getting the valve rod back in place can be a challenge. It’s heavy (of course); awkward, and often
reluctant to be thrust back into its chamber. The rings on the valve heads have to be a close fit in
order to seal the steam. Persuading the rod to go into the bush at the far end requires skill plus a
pointy thing. Much waggling and pushing is required to line everything up. Hence, it took much of
the day!


Bruce had taken the snifting valves home to machine the seats and lap the valve head. He refitted
them today, and also wired up the insulation, which had previously be tied with string … which had
not lasted the course! Brian plus a couple of Loco Dept chaps gave the cladding a good clean and
tapped the bolt holes before fixing that back over the steam pipes.

David brought the tool that he has made at home ready to adjust the valve timing. He applied
yellow paint plus a clearly marked “2807” on it. We use yellow paint as a marker for our tools. He
then took measurements of the rocking shaft components that were taken apart on Wednesday,
and has taken the top cover home to machine it down a few thou’ to make a good fit. Thereafter, he
was trying to ream out some bushes in the rocking shaft arm and the intermediate valve rod that
connects to it. However, we could do with some sharp reamers!

You may have heard about a loco and tender becoming separated last year? It was apparently
caused by the large nut that secures the drag link to the tender drag box having a worn thread. The
thread stripped; the safety cotter pin behind the nut held on for a while, but eventually sheared, and
the loco and tender jolted apart, held (fortunately) by the two safety links. As a result, GWSR have
asked loco owners to inspect their nuts and check for any signs of undue wear.

Alistair and I worked on removing the main draw bar. This involved removing buckets full of coal
dust. Vis. there’s even plant life growing in it! Once the centre section was cleared, we could see
the panel that had to be lifted in order to extract the securing pin. That took a while, because it was
happy staying where it was - and I even cleaned and removed a small panel on the other side,
thinking that it was all one piece of metal that goes through … but it wasn’t! The deft use of a
screwdriver and copper mallet persuaded this small panel to lift, and we got the pin out.


Then we could remove the draw bar. By use of a standard-issue broom handle, Alistair
demonstrates how bent it turned out to be. We set up the 50 ton press. Carpo got some heat on
the go. John took over from Alistair, and we got ready to bend the bar back into shape. When it was
well and truly red hot, John inserted a lump of steel in the press and I started pumping away on the
hydraulics. Not a lot was happening! After a bit of puzzling and prodding, we discovered that the
little valve that releases hydraulic pressure had stripped its thread, and was not sealing the fluid.
Hence, I was doing nothing but pumping fluid round in a circle! Activity aborted. Hydraulic press
needs mending.


With part of the tender coal space floor removed, you can get to the nut. Well, you could after the
removal of three buckets full of coal dust, slack and grime! There was up to three inches of grot
lying on top of the vacuum cylinder. This is now a tad cleaner and we can inspect the nut next
Wednesday.

On the bright side, I purloined a handful of coal dust/slack, and with skilled use of two sieves I now
have a goodly pile of 00 scale sized coal for my two-year old grandson’s model railway (that I’m
building in my spare bedroom).


Roger

Sunday 8 January 2017

Maintenance Update (tender, coal, shoes, valve)

Sunday 1st Jan 2017
We had a family ride, but behind the Manor. 2807 was on the other train, which we passed at Winchcombe. No new issues logged against 2807 at the end of the day.

Monday 2nd
I was quite surprised to see 2807 out today; I had assumed it would be the Manor. It transpired that the Manor had blown a gasket in one of its injector feed pipes, and as a result was failed.
See this post.

Wednesday 4th
Six of us turned up to make a start on the winter maintenance, but it all went very slowly. We carried out the winterisation work: removed the insides of the injectors; removed the pressure gauges; drained the water from the hydrostatic lubricator sight glasses; emptied the boiler; emptied the tender water; opened all sort of valves (steam heat, tender drain cocks, gauge frame, vacuum relief, …). Loco Dept chaps also cleaned out the grate and the smokebox [that was Peter, that was], and washed down the tender coal space (though they must have missed to rear section, because Brian did that afterwards!).

Bruce and I disconnected the water, vacuum and heating hoses between loco and tender, as we want to separate them to carry out some tasks. Separating the loco & tender was the only exciting thing of the day, really! We were shunted around a bit, before the 04 shunter was able to buffer up sufficiently to release the main drag link. The first attempt simply saw the 04 wheels going round and the little diesel going nowhere! The second attempt was successful, and I pulled the pin out. There are two safety links between loco and tender (in case the main one should break) but these are easy to remove. The main one is tight so that the loco and tender remain close-coupled.


There was one new issue logged (on Monday) by JC:
55: Suspect snifting valves need lapping in - leaking steam?

We had a group discussion about some of the logged issues. Carpo was of the opinion that we
should ignore some of them, as they are not a significant problem. However, he does want us to
change the brake shoes on the loco. New ones are currently being prepared in the machine shop.
Clive [Loco dept] seemed to volunteer his chaps to do this for us! Carpo also commented that the
loco “rides a lot smoother now the compensating beam is the right way round.”

Loco Dept chaps have also been volunteered to: repack the leaky piston gland; paint the rear section of the tender top; and apply bitumen to the coal space.

So, my thanks to Loco Dept, plus our happy band: John G, John T, Gil, Bruce and Brian.

Friday 6th
Popped down to deliver rail chairs & Plusgas; For a moment, I had a flash back to my shed-bunking
days in the 60s:


Saturday 7th
Bruce reports: “When we arrived there was already a gang of people working on Dinmore as well as
4270. It seems that valves are the flavour of the month as that is what they were removing from
both locos. Strangely, we were also intending to remove one of our valves.

We were a bit thin on the ground today, only three of us, so we all worked on removing the LH valve. Gilbert, John T and Bruce started by removing the running boards at each end of the cylinder to give better access to the crosshead and front cover. John then concentrated on removing the valve front cladding followed by the front cover.

At the rear end the cotter was removed and the crosshead split from the valve rod but try as we
might the valve spindle did not want to be parted from the crosshead. We pulled it, we bashed it,
we even tried our splitter but all to no avail, the valve rod that connects the crosshead to the rock
shaft always seemed to get in the way.

At this point we adjourned for lunch to regain our strength and discuss tactics. Perhaps, if we crept
up on it we could take it by surprise and it would come out easily; alas, no. Perhaps if we could get
the valve rod out … but the motion was not in the correct position. Fortunately by moving the
reverser to the full forward position the rod just cleared the motion bracket and came out. Now
with better access the stubborn taper was released, so the crosshead could now be removed
followed by the valve spindle.


We were ably assisted by Tim P and Jamie [steam dept] throughout the day; they provided some of
the brute force as well as moral support.


We also need access to the pistons to measure wear, so John removed the front cladding and Jamie
loosened the cover nuts so that they will be easier to remove next time.

While all this was going on, Chris and Tom [steam dept] replaced the gland packing on the right hand piston rod, it had been reported leaking during the winter gala [Issue 47].”


Roger

Monday 2 January 2017

Last day of the operating season, 2nd January

No. 2807 was still working hard on Monday 2nd January, the last day of the GWSR operating season.

Seen here at Cheltenham racecourse station.


The next operating day for the railway is Saturday 4th March 2017.


Steve